
You chose the perfect self-tanner … now what? My tips to achieve the most flawless self-tan EVER
Okay, so you’re here from my previous self-tanning post, where I shared some of my favorite self-tanners (you’re welcome!). You’re standing butt naked in front of your bathroom mirror, wondering where the heck to start.
I got you. Call me your (tan) Fairy Godmother.
First of all, I hope you’re fully clean, shaved, and exfoliated. And I hope you did all that yesterday, not today. Here’s why:
The average person loses around 500 million skin cells per day, according to ScienceLine. I know it seems like a lot— quite frankly, it’s not, compared to the number of skin cells our bodies are made up of. Still, though, those dead skin cells oftentimes remain on the skin and in our worn clothing. If you were to apply a self-tanner on top of that dead skin, the tan would be patchy, uneven, and short-lasting. Exfoliating your skin helps tremendously in providing a clean, smooth surface for the self-tan to absorb evenly. I usually use a loofah, washcloth, or my favorite exfoliating glove.
However, for best results, you want to exfoliate a few hours before you self-tan (or even the night before) to give your skin ample time to calm down a bit before applying the tan. “One of the most common self-tanner mistakes I see—and warn my clients about—is shaving or exfoliating immediately before self-tanning,” Ashlynne Serrano-Padilla, a professional makeup artist and body artist, tells Real Simple. Applying a self-tanner onto freshly exfoliated skin may result in a patchy tan. And the same goes for shaving. When you shave right before self-tanning, you risk those dreaded “strawberry legs” that resemble, well … strawberries.
You also want to make sure you don’t have any thick lotion on, as it can disrupt the consistency and smoothness of the self-tanning application.
Now that we got that out of the way, it’s time to tan! I usually like to start with my legs and work my way up, ending with my arms. If you apply the tan to your arms first, it could cause creasing in the inner surface of your forearm from the rubbing motion.
Here are some tips for tanning the legs and feet:
I know I said no lotion, but I do like to apply a thin layer to my super-dry areas like kneecaps and ankles. This prevents the tan from clinging to those areas.
Don’t start at the feet. Start at the top of the ankles and work up. Then, with whatever product is left over on the mitt or glove, after the legs are done, rub your feet (with your toes pointed).
I like to avoid pumping more product on the glove before applying it to the feet because the feet tend to soak up product the most, resulting in super-dark feet — a dead giveaway that your tan isn’t natural.
For a precise application, pump a super small amount of self-tanner onto a clean powder brush and apply in circular motions to the feet.
When applying tanner to the back of the ankles, extend your foot so the toes are pointing to the ceiling. This will prevent those unsightly crease lines.
Here are some tips on tanning the tummy and back:
The back sucks. I have shrimpy, short arms, so I literally can’t reach. This tool is a lifesaver and really helps reach those parts you just can’t get to.
Putting the mitt on backward and using the back of your hand to reach your sides and back is also super helpful!
Here are some tips on tanning the neck, chest, and arms:
Lift your head back and up when applying tanner to your neck. Some of us have thicker necks, okay? Get all up in there.
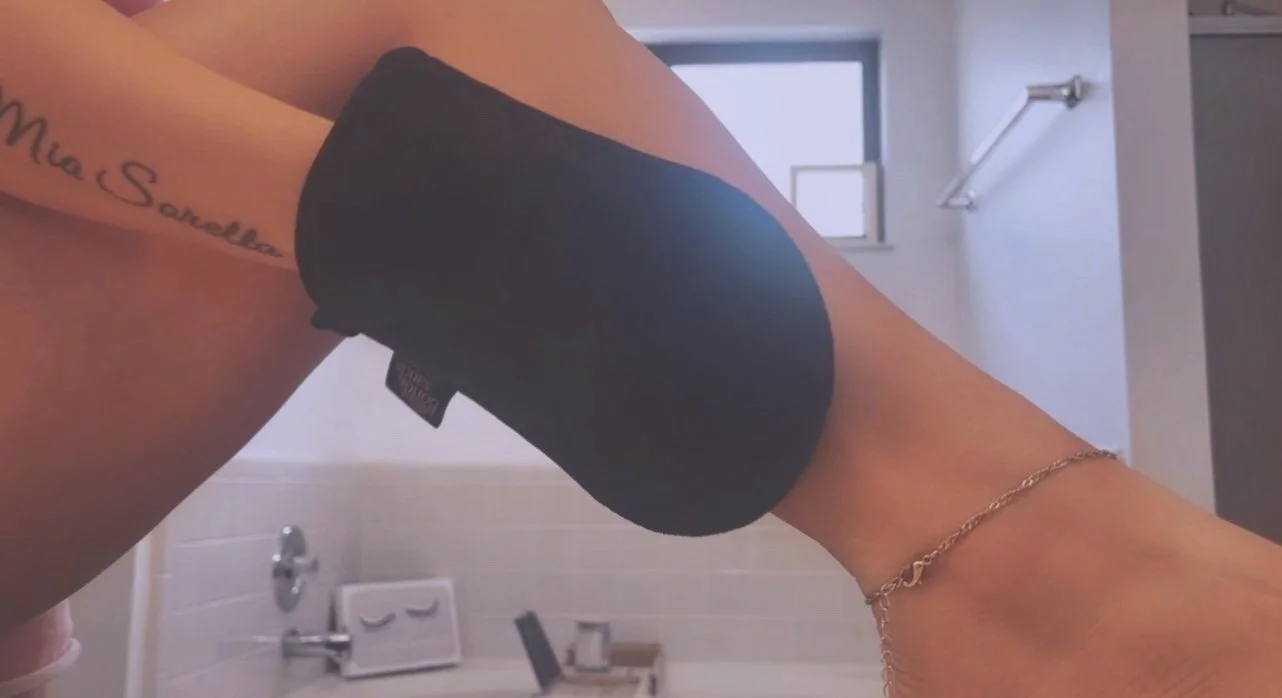
Be careful around the elbows! They are dry, and self-tanner loves to cling to them. Move the mitt/glove around the elbow and lightly go over them when most of the product is off the glove.
Do the same with the hands as we did with the feet. Use the leftover product on the glove for the hands — don’t pump a new amount onto the glove.
When applying the product to your hands, bend your fingers like you’re a dinosaur going “rawr” or a kitty about to strike. I have super wrinkly hands, so that helps get the tanner in all those little knuckle lines.
OR — Use a powder brush, like the feet hack!
What about the face?
Because I have sensitive, dry skin, I like to use a self-tanner that’s specifically designed for the face; my favorite is the St. Tropez Bronzing Water Face Mist. An affordable option is the Sally Hansen Airbrush Legs Tanning Water. These are face sprays, so there’s no rubbing involved (which I prefer!). When tanning the face, it’s important to keep in mind where your imperfections, acne, dark spots, dry spots, etc. live because self-tanner can accentuate those spots.
Sometimes, I won’t even tan my face — I’ll just use a foundation that matches my new glow.
Self-tanning can be a huge chore, but the bronzed-goddess feeling you get afterward is totally worth it. Remember to moisturize, moisturize, moiturize with a paraben-free/sulfate-free lotion like Aveeno or Vaseline. Stay away from scented Victoria’s Secret, Dove, and Bath and Body Works lotions, as they can interfere with the tan’s longevity.
Did I miss anything? Do you have any tips you want to share with our fellow glow babies?! Sound off in the comments below! ❤️